Build a menu
Who: manager or Admin. Cashiers can also do this unless an Admin has turned it off. Only an Admin can link the menu to a POS configuration. When: once, then whenever items are added or moved.
The menu controls which buttons show on a restaurant register. Until a menu is linked, the order screen says No menu yet.
Quick version
Catalog › Menus › Create new menu › add a main screen › Add button › Item › select the items › an Admin links it to a POS configuration.
1. Create the menu
Go to Catalog › Menus, click Create new menu, and give it a name, such as Concessions.
2. Add a main screen
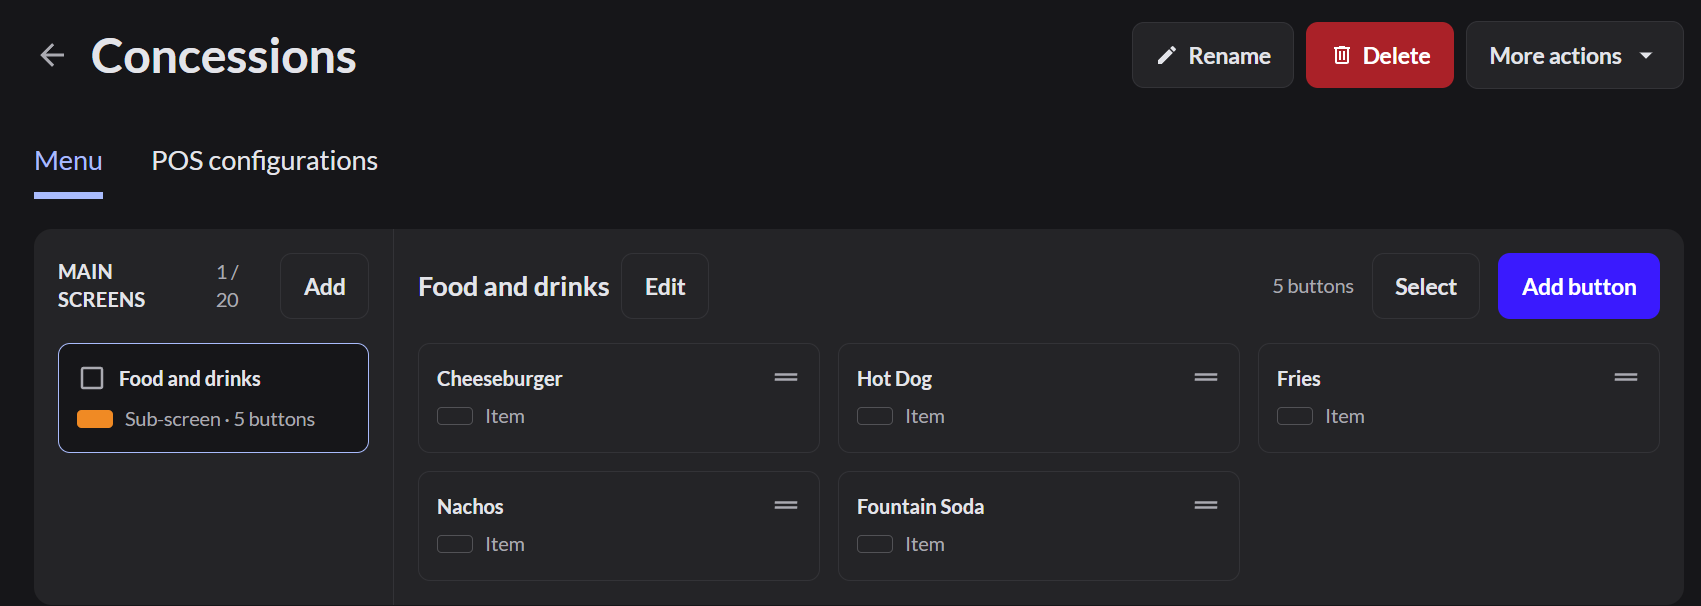
Click Add next to Main screens. Name it, such as Food and drinks, pick a color, and click Save. Each main screen is a tab on the order screen.
3. Add the items
Click Add button › Item, select the products, and click Add items. Use Add button › Sub-screen to group items, such as Drinks.
4. Put the menu on the registers
Admin only: open the POS configurations tab and click Add POS configuration. Select the configuration your registers use (usually Default), and click Link.
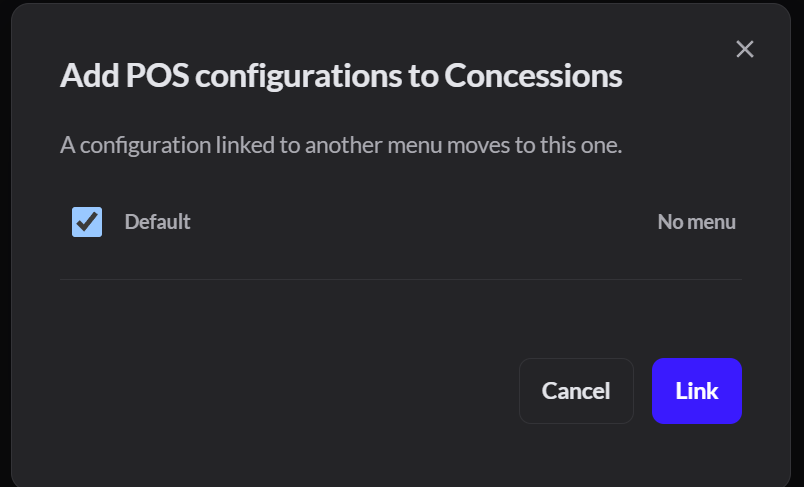
The buttons now show on every restaurant register that uses that configuration.